
How to do polygel nails
Hey beauties! If you’re looking to switch up your nail routine and try something new, you’ve come to the right place. Polygel nails are the perfect way to give yourself a salon-quality manicure without the hefty price tag. Here’s everything you need to know about how to do polygel nails!
Polygel nails are a great way to do just that! Polygel nail extensions are a type of manicure that uses a special type of gel to create beautiful, long-lasting nails. This method of nail extension is relatively new and gives you a lot of creative freedom. With polygel nails, you can customize your nails in any way you want and make them as unique as you are. In this guide, we will walk you through the steps of how to do polygel nails and give you some helpful tips along the way. So, let’s get started!
The tools you will need
- First things first, you’re going to need a nail lamp. This is necessary for curing the polygel nails and it should be a UV or LED lamp. You’ll also want to invest in a nail drill. These are great for buffing and shaping the nails.
- Next up, you’ll need a few types of nail files. A 120, 180 and 240 grit nail file are all essential for prepping the nails and getting them ready for the polygel. Make sure you invest in good quality files as they will last you longer.
- You’ll also need a cuticle pusher, cuticle nippers, cuticle remover and an orange stick for cleaning the nails and keeping them clean.
- Finally, you’ll need the polygel itself, along with a few other tools such as small paintbrushes, gel brush, gel primer, gel topcoat, and a cleansing solution. All of these are necessary for properly applying the polygel.
That’s all you need for doing your own polygel nails! Investing in good quality tools will ensure that your nails look great every time.
Preparing your nails
Polishing your nails is an important part of nail care. Whether you’re getting a manicure or doing your nails at home, taking the time to properly prepare your nails is essential for achieving a beautiful, long-lasting result. Here are some tips for preparing your nails for a polygel manicure.
- First, make sure your nails are clean and dry. Start by using a nail brush to remove any dirt and oils from your nails. You may also want to use a nail file to shape your nails. Then, use a cuticle pusher to gently push back your cuticles.
- Next, apply a cuticle oil to your nails. This will help keep your nails hydrated and keep them looking healthy.
- Once your nails are prepped and ready, it’s time to apply the polygel. Start by applying a thin layer of the gel to your nails and then use a brush to spread it out evenly. Make sure to cover the entire nail surface, including the tips and sides.
- Finally, cure your nails under a UV lamp for the recommended amount of time. This will help the gel harden and create a strong bond. Once your nails are cured, you can shape and buff them to your desired look.
By following these steps, you’ll be able to achieve a beautiful, long-lasting polygel manicure. Don’t forget to finish off the look with a clear topcoat for extra shine and protection. With just a bit of time and effort, you’ll have gorgeous nails that will last for weeks.
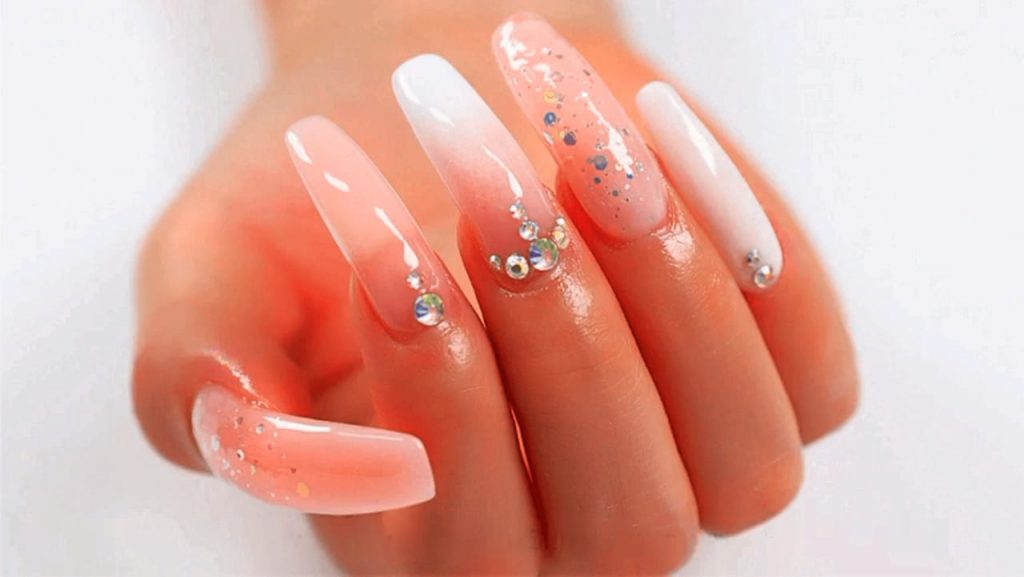
Applying the polygel
If you’re looking for a way to step up your nail game, then you should definitely consider trying polygel nails. Polygel nails are a form of sculpted nails made from a combination of a gel and acrylic powder. They provide a strong and flexible base for your nails, allowing you to create amazing and intricate nail designs. Applying polygel nails isn’t as hard as it looks and with a few simple steps, you can have beautiful polygel nails in no time!
- The first step in applying polygel nails is to prep your nails. This involves buffing, filing and cleaning your nails to ensure they’re in good condition before you start. Once you’ve prepped your nails, you’ll need to apply a nail base coat. This will help the polygel adhere to your nails and provide a strong base. After the base coat is applied, you’ll need to apply a thin layer of polygel to each nail. You’ll want to work quickly and accurately as you’ll want to avoid any air bubbles or unevenness in the polygel.
- Once you’ve applied the polygel, you’ll need to shape and file it. This can be done with a nail file or buffer, and you’ll want to make sure that you have the desired shape and length. After filing, you’ll need to cure the polygel with a UV light. Once the polygel is cured, you can then apply any designs or nail art. After the design is complete, you can then apply a clear top coat to protect the design and make sure it lasts.
Applying polygel nails may seem like a daunting task, but it’s actually quite straightforward. With a few simple steps, you can have beautiful and durable nails that will last you weeks. So why not give it a try and see how you like it? You won’t be disappointed!
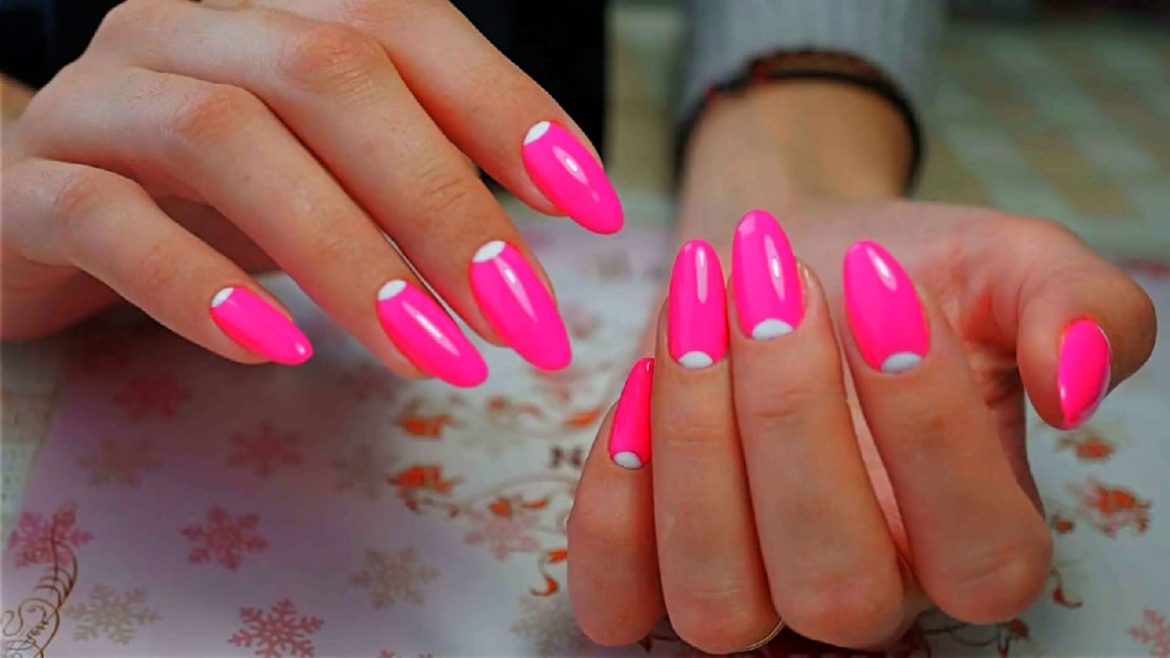
Finishing touches
Polygel nails are a great way to get a beautiful manicure with long-lasting results. But, if you’re not careful, you could end up with a manicure that doesn’t quite look as good as it should.
- The first step to getting the perfect finish is to make sure that you file your nails properly. You should use a nail file that is fine enough to smooth the edges without damaging the gel. Then, you want to make sure that the surface of the nail is completely smooth. This will ensure that the polygel has an even surface and that the color will be applied evenly.
- Once you’ve got the shape and the surface of the nail looking perfect, it’s time to apply the polygel. Make sure that you apply the polygel in thin layers and have a good idea of how thick you want your nails to be. Once you’ve applied the polygel, you’ll need to cure it under a UV light. This will ensure that the polygel has set properly and will last longer.
- Finally, you’ll need to apply your chosen color. Make sure that you apply the color evenly and don’t forget to cure it under the UV light. Once the color is cured, you can add a top coat for extra shine and protection.
And that’s it! With these finishing touches, you’ll be able to get perfect polygel nails every time. Good luck, and happy polishing!